|
While images are not crucial to a good Moodle site, they do play a role in focusing students' attention, breaking up blocks of text, and supporting your course content. It is very easy to add images to a Moodle label, a Moodle page, or any Moodle resource or activity using the Moodle content editor. We recommend that you use the Firefox browser when adding images as it seems to work best with Moodle and image insertion.
[NOTE: In order to ensure images are always visible to students and/or are properly imported to a new course site, it is important to follow the steps below rather than simply "copying & pasting" an image. This means you must first download the image as a file (a PNG or JPG) to your computer).
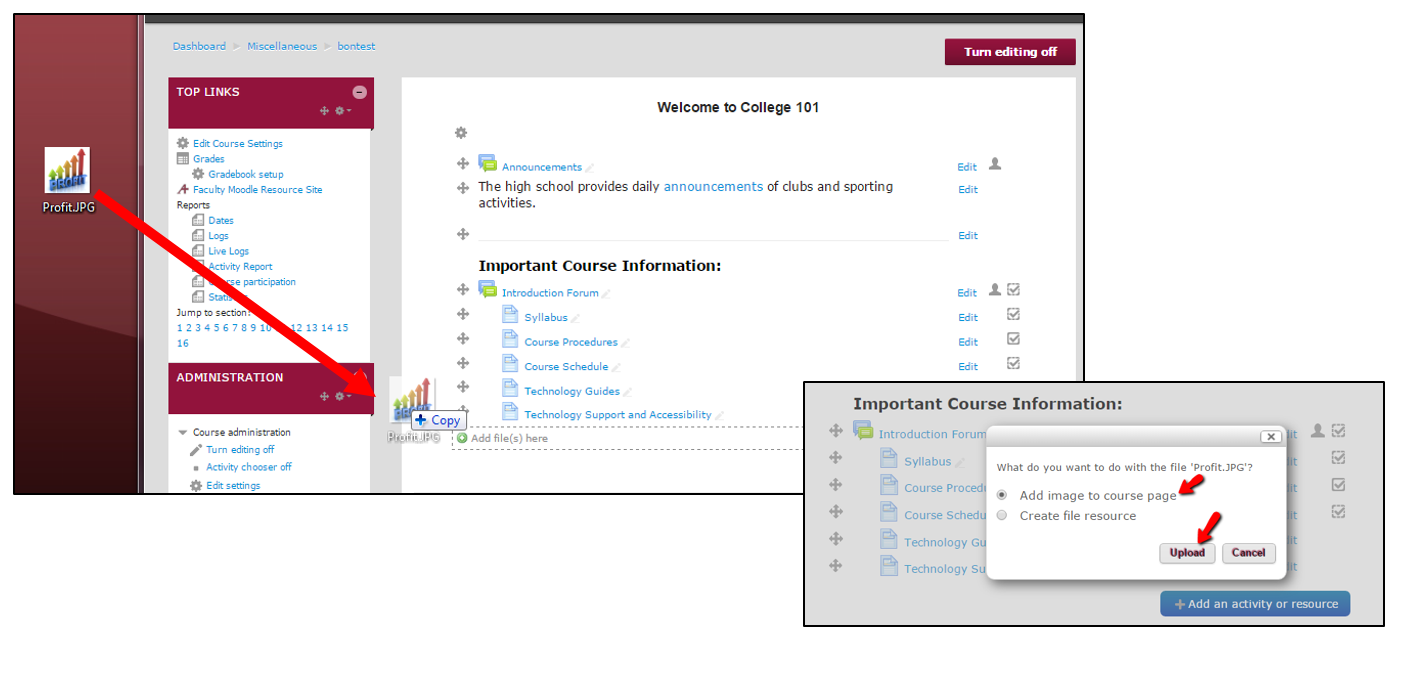
- If you simply want to add JUST an image to the main page of your course, turn editing on and then drag & drop the image file into the desired topic section. This will automatically put the image in a Moodle label. [NOTE: You will be asked whether you want to "Add image to course page" or "Create file resource"--Select "Add image to course page" and "Upload."] You can resize the image by clicking on "edit/edit settings" and grabbing the corner of the image to either enlarge or contract.
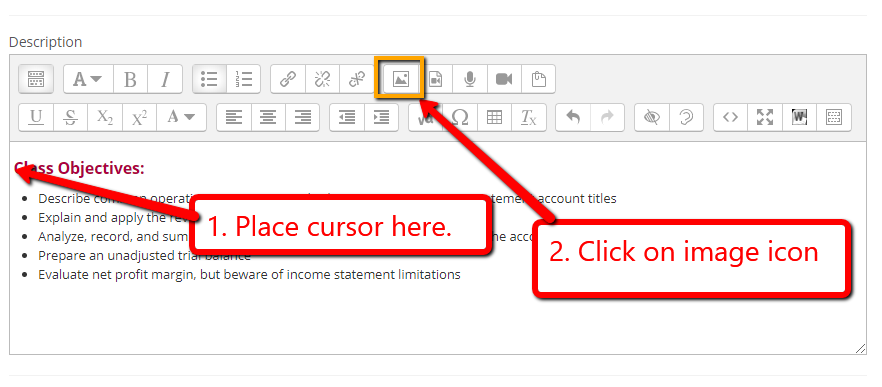
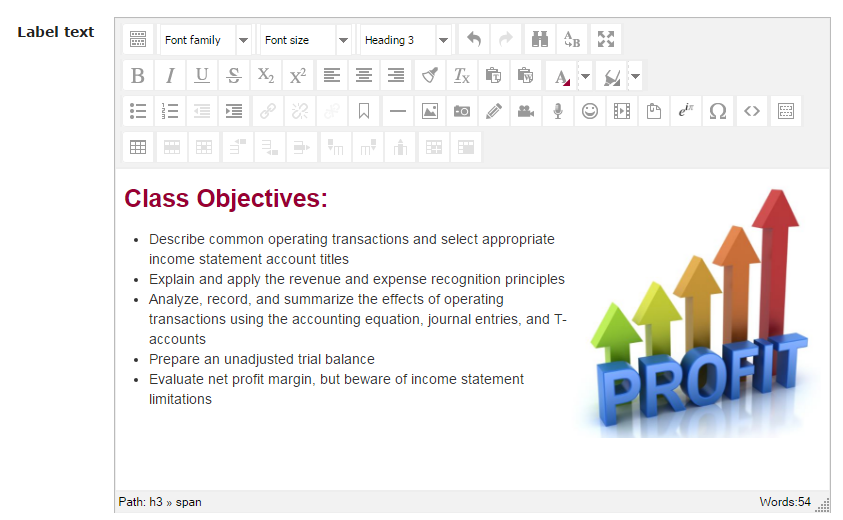
- To add an image to a label or page that has text, place your cursor in front of any text and in the content editor of the resource or activity (usually a Moodle label or page), click on the image icon (it looks like a small landscape).
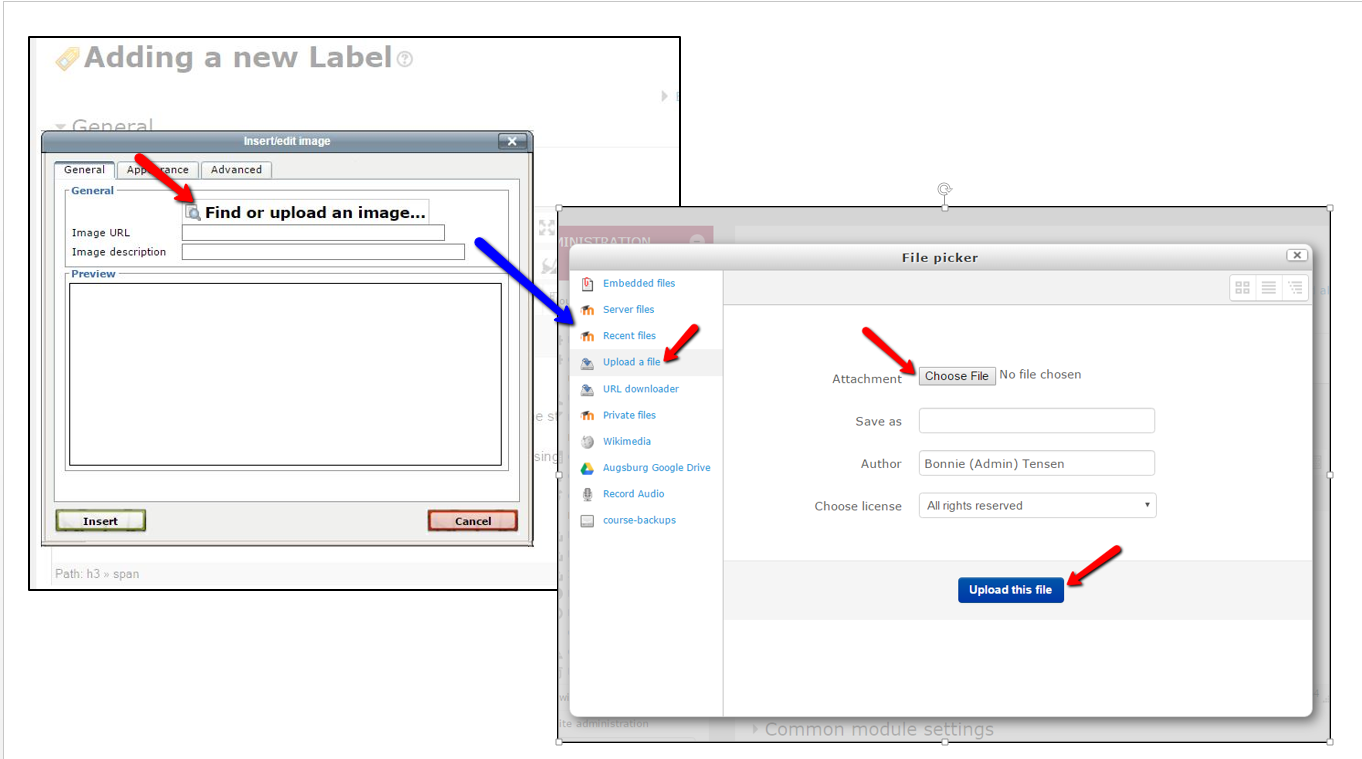
- In the window that opens, click on "Find or upload an image..." In the window that opens, make sure "Upload a file" is selected on the left, then click "Choose file" and select the image file you have saved. Then click "Upload this file."
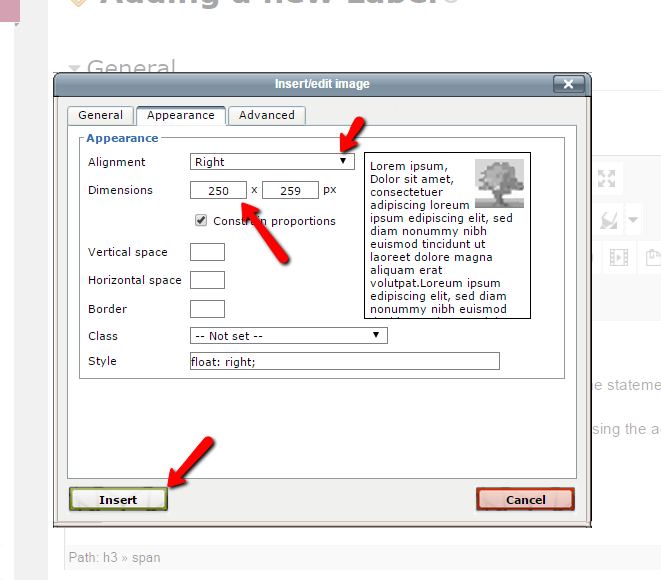
- The image will appear in the "Preview" window. Add a text description of the image (for accessibility) and then click the "Appearance" tab to resize the image and select the placement in the label or page.
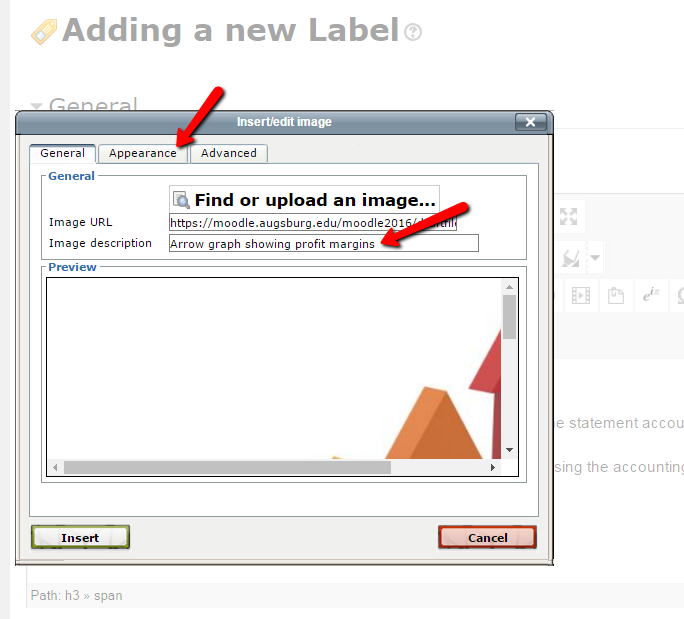
- Under alignment, select where (in the label or page) you want the image to appear (usually to the "Right" of the text is a good choice) and also the Dimensions. Some have found that 250-300 pixels in the first box (the second will automatically adjust to the proper dimension) works best. NOTE: You can always resize the image later in the editing mode by grabbing the corner of the image and expanding or contracting it] Then click "Insert" to add the image.
- The image will be added to your label.
http://go.augsburg.edu/addimage
(Faculty) For additional help with Moodle, visit the Faculty Moodle Resources site at http://go.augsburg.edu/fmr.
Last Modified: 2020/06/19 - updated the note
|