|
| Note: This article is for TinyMCE. The ATTO content editor is an available option, supported and designed to aid accessibility of content. More info: http://go.augsburg.edu/matto |
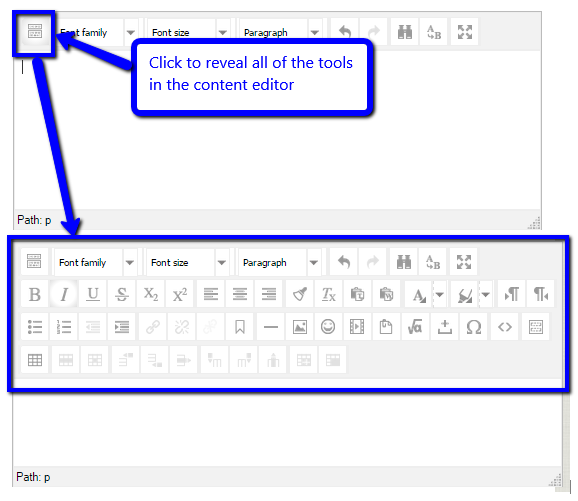
The content editor tool set in Moodle is available in most locations where adding text or images is expected (i.e. forum posts, online text, labels, assignment description fields, page resources, and more.) [NOTE: You may need to click on the square in the left corner to reveal all of the features (the tool pallette) in the content editor.] Sometimes called a WYSIWYG (pronounced wizzy-wig) editor, which stands for 'What You See Is What You Get', this tool allows people to create web content without having to know HTML - a standard language in web page creation. Here are the first five things we think you should know about using this editor:
1. Insert Link (URL)
2. Resizing the Editor Window
3. Insert or Edit an Image
4. HTML Mode
5. Copy and Paste from Word? - Be Aware!
1) Insert link (URL)
A web page can be linked by defining some text or other content as a clickable link in the editor.
- Select a word or phrase that will be the clickable link to the web page.
- Click the Link button from the tool palette.
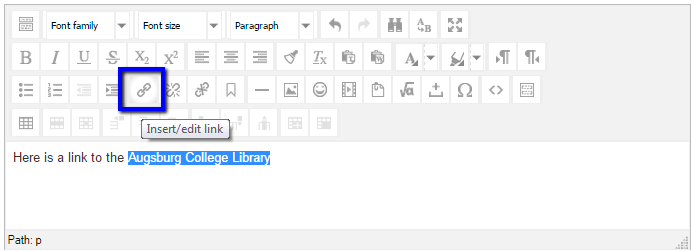
- Enter the 'Link URL' which is the web address of the web page and starts with http:// .
- (Recommended) Set the Target to be 'Open in new window (_blank)'. This tells web browsers to open the destination in a new window or tab, leaving the originating page loaded and available to the user.
- Click 'Insert'
You may also want to create a stand-alone resource that points to a web page.
Learn about creating a URL resource with this article: http://go.augsburg.edu/moodlelink
top
2) Resizing the Editor Window
If you are planning to spend some time in the editor or have a large amount of content to work with, resizing the editor window can be beneficial. You can change the size of the editor window in two ways:
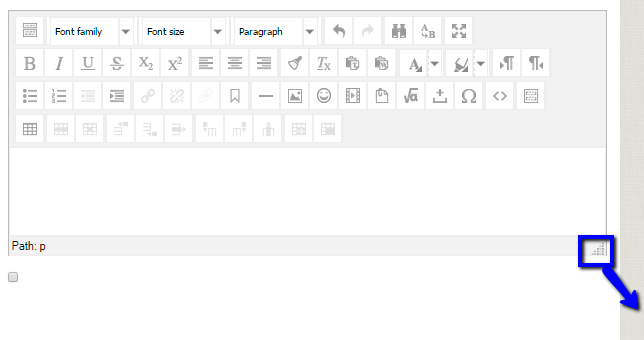
- Option 1) Click and drag the lower-right corner of the editor window to resize the region.
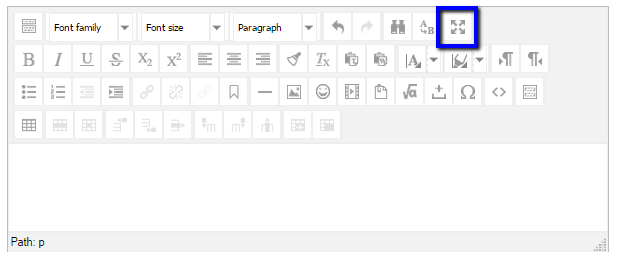
- Option 2) Click the 'Full screen mode' button in the upper-right corner of the tool palette. This opens a new window that shows just the editor in a full screen mode. When you are finished editing your content, click the 'Full screen' button again to return to the normal editing page. Make sure to scroll to the bottom of this page and save your changes!
top
3) Insert or Edit an Image
The content editor is able to import and display images as well as text and web links. You can place images inline with text or positioned away from text. Here's how:
- Click the 'insert/edit image' button in the editor tool palette. This button looks like a landscape painting.
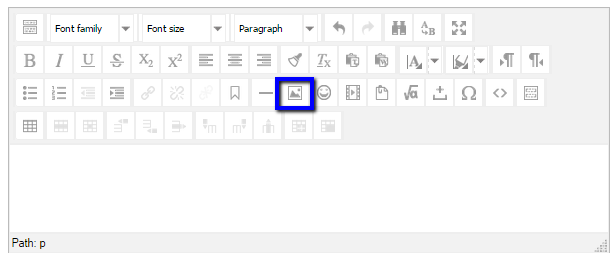
- Upload an image:
- Choose 'Find or upload an image…', then click 'Browse' in the File picker window.
- Locate and select the image file from your computer and click 'Open', then click 'Upload this file'.
- You will see a preview of the image in the insert/edit image dialog box.
- Enter a descriptive value in the image description field. This makes the image accessible to screen readers and is considered best practice.
- To modify the alignment of the image with other content, select the 'Appearance' tab. Select from the Alignment pulldown menu to choose the desired setting. You can look at the preview box to the right to see how each setting affects the layout before making your choice.
top
4) HTML mode
One popular example of using HTML mode in the editor is for adding content that will be embedded in the resource, (such as a YouTube video, VoiceThread, Library database resources or other embeddable content). Use this mode to paste in embed code provided by these tools.
- Copy the embed code from your source content to your clipboard
- Click the HTML button in the tool palette (it looks like a set of angle brackets) - a HTML source editor window will appear
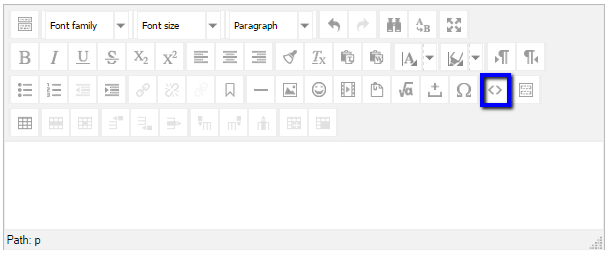
- Paste the embed code and click 'Update'. The HTML code will render in the WYSIWYG editor window.
top
5) Copy and Paste from Word? - Be Aware!
Because the WYSIWYG editor is designed to create web content, there are inherent limitations to how content not designed to be used as a webpage is interpreted by the editor. When copying and pasting from, for example, a Microsoft Word document which can use a large amount of Word-specific formatting features behind the text you select, all of this information can get translated into alternate characters, funky formatting, or outright incompatible code that creates unnecessary gibberish in the background or worse yet, a dysfunctional webpage.
How to navigate this limitation:
- Option 1: Create your content directly into the editor. Nearly all the standard formatting tools (text color, size, alignment, font formatting) are available in the editor tool pallette and anything you create will inherently be using code design for the web pages. Take a moment to consider this. In this day and age is there anything you would create now that wouldn't be applicable for use on the web. I might just want to begin using the editor from the start instead of having to translate content from Word later when you are ready to distribute it.
- Option 2: If you are not creating content from scratch and you must use existing content from a Word document, use the 'Paste from Word' button (clipboard icon with a 'W') found in the editor tool palette and paste your content into this window. This cleans out most of the unusable code found in Word and for easier integration into Moodle.
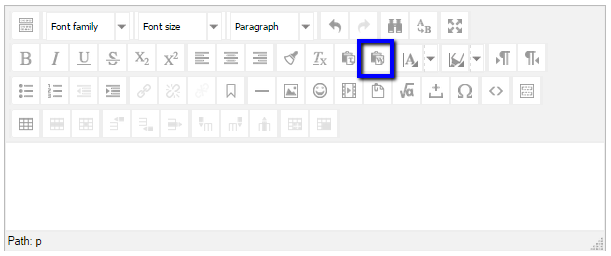 Note: This button does not exist in the ATTO editor. Note: This button does not exist in the ATTO editor.
Alternatively, paste your word content into a more basic text editor (such as TextEdit on a Mac or Notepad in Windows). Then, copy this content from that file and paste it into the editor window.
top
Related knowledgebase articles:
(Faculty) For additional help with Moodle, visit the Faculty Moodle Resources site at http://go.augsburg.edu/fmr.
Last Modified: 2019/08/19 - updated notes
| 


