|
You can define a printing preset to send print jobs as double-sided and have your computer use it as the default setting for print jobs to a specific printer or all or your installed printers that support duplexing.
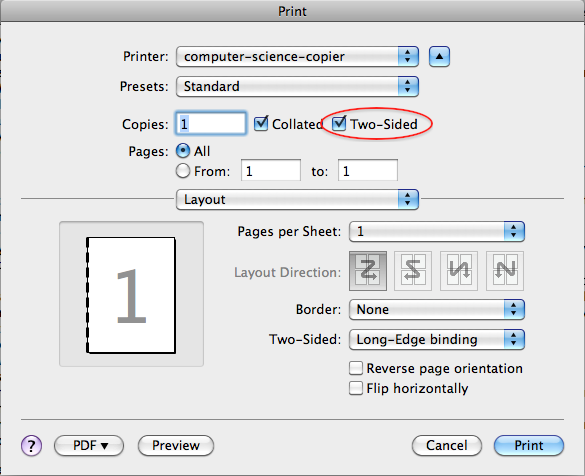
- Open a browser such as Firefox (or any application that supports printing) and choose "Print..." from the File menu. In the print dialogue box that appears, select a printer you wish to have duplexing set as the default setting.

- Enable the Two-Sided check box. NOTE: If you do not see a Two-sided option for this printer, you may need to enable duplex options for that printer driver.
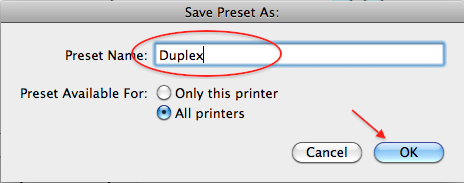
- Name your new preset (e.g. "Duplex") and click "OK".
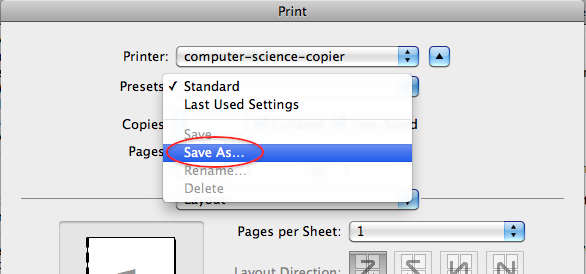
- Name your new preset (e.g. "Duplex") and click "OK". Note: you can assign this preset to be used by all printers or just the selected printer.
- With the Duplex preset selected, hold the command key and select either the "Print" button at the bottom right or "Save as PDF..." from the PDF pulldown menu at the bottom left.
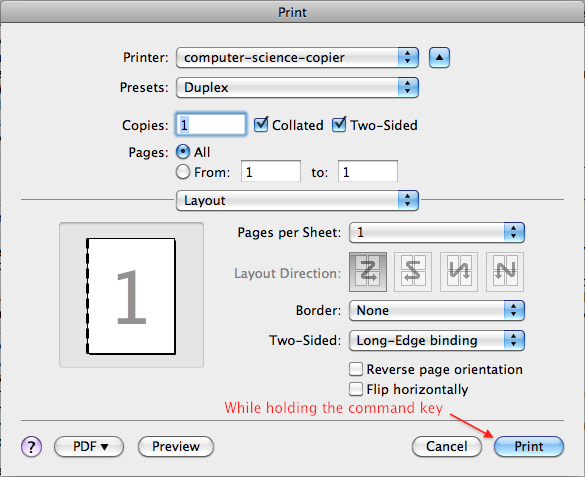
Your duplexing preset is now set as the default preset.
Enable Duplex Options
For some printers, drivers settings need to be modified to enable duplex printing to that device.
- Go to System Preferences > Printers & Scanners > and select the printer you wish to enable duplex printing.
- Select the 'Options' tab for the printer and enable (select) the Duplex Unit checkbox and click OK.
NOTE: You may need to relaunch the application you were printing from before these drivers settings are made available.

(keywords: print, printing, two-sided, duplex, default, mac)
http://go.augsburg.edu/macduplex
Last Modified: 2015/04/10
|