Creating and Sharing a Video using a Flip Video Camera and a Mac computer
Step-by-step instructions for how to create a video using a Flip Video Camera and burn the video to a CD for sharing with others,such as your instructor.
Flip Video Cameras are available for check out from the Lindell Library.
There are a limited number of cameras, so please do not wait until too late in the process to check one out. Also once you have checked out a camera, be sure to return it to the library as soon as possible to give other students a chance to complete their project.
Recording Video on a Flip Video Camera:
- Press the power button on the side of the Flip
- Position the Flip, using the flexible tripod
- Press the red circle to begin recording
- Press the red circle to stop recording
- If you press the red circle again, a new, second video will be recorded (separate file)
- Play the video using the triangle play button
-
Connect the Flip to a Mac computer’s USB port
- There are Mac computers available on campus in the Lindell Library Multimedia Lab as well as in the Foss 22B Mac lab, or you may use your own Mac
- The USB connector “flips” out of the side of the Flip camera
-
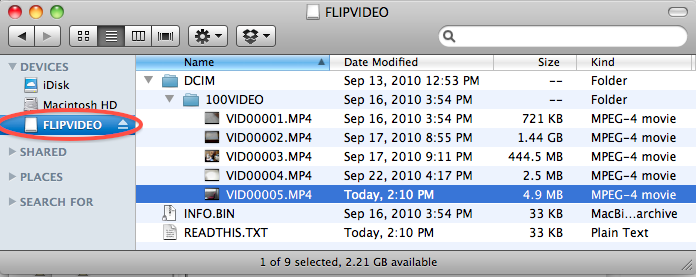
Open the Finder window

-
Click on FLIPVIDEO at the left side of the Finder window
Locate your video file inside of the DCIM/100VIDEO/ folder
Insert a blank CD into the CD/DVD drive of the Mac computer
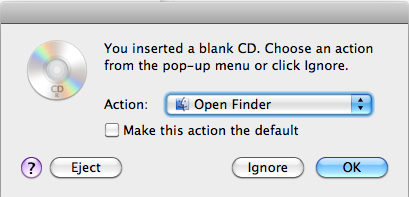
*Note: The maximum file size for burning to a CD is 700MB
- Drag your video file to the "Untitled CD" icon at left
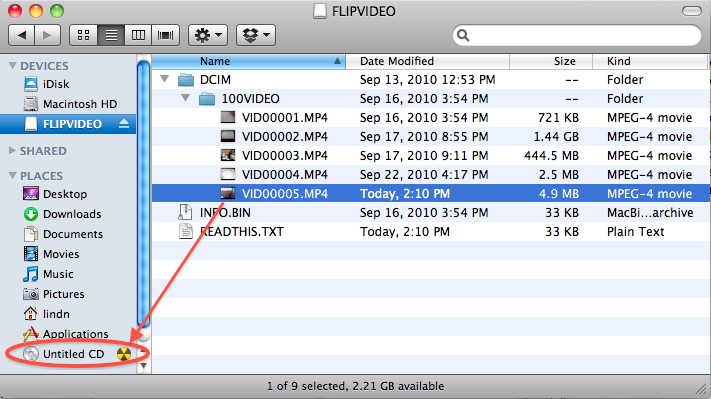
- Click on the “Untitled CD” icon at left
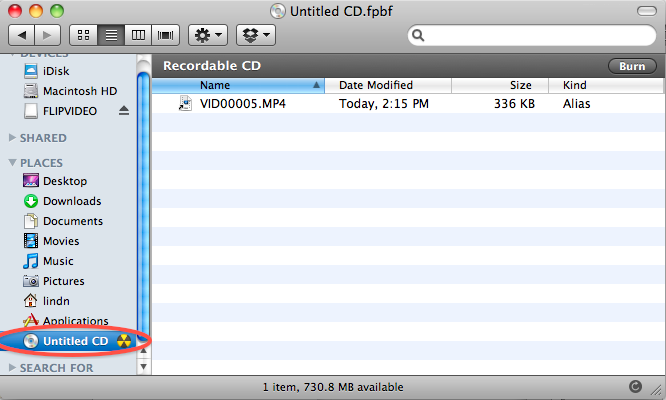
- Click “Burn” in the upper-right
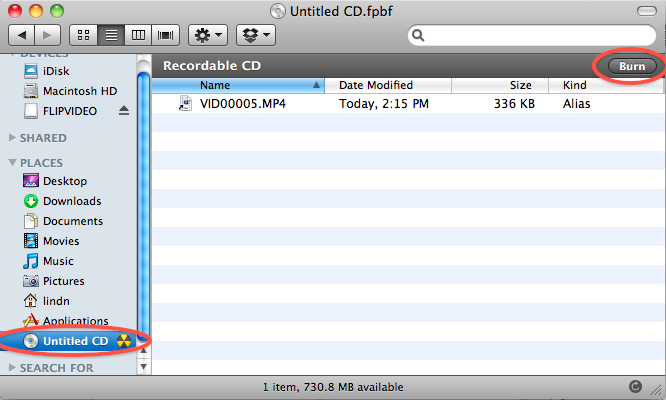
Name the disc with the following naming framework or another suggested by your instructor:
- username_video (for instance davis12_video)
-
Click “Burn”

-
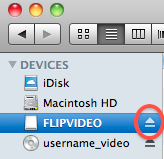
Click the eject symbol for FLIPVIDEO in the Finder window, then remove the Flip from the Mac computer’s USB port
-
Final Steps:
- Check the video on the CD to be sure it was burned successfully, by playing it, preferably on another computer (be sure to also check the audio, which may require plugging in headphones)
- If the video plays successfully, delete the video from the Flip camera (trash can icon)
- Return the Flip camera to the Lindell Library
- Give your CD to your instructor
Alternatives to Flip Video Cameras:
- Standard digital camera – many digital still cameras have the ability to record video.
- iPhone
- iPod Touch with camera
- MiniDV digital video camera
Alternative to burning your video to a CD:
- Upload to an online video-sharing site (account required) such as:
- Note, your video may be made more or less private based on settings available in these video-sharing sites. If you make your video private or password-protected, you may need to provide a password and link to your instructor to allow them to view your video.
(keywords: flip, dvd, cd, mac, burn)
|