|
Instructional content added to a Moodle course must be accessible. This guide will primarily cover how to make content created within the Moodle text editor accessible (compatible with assistive technologies like screenreaders). For uploaded files, refer to the guidelines for the program used to create the file:
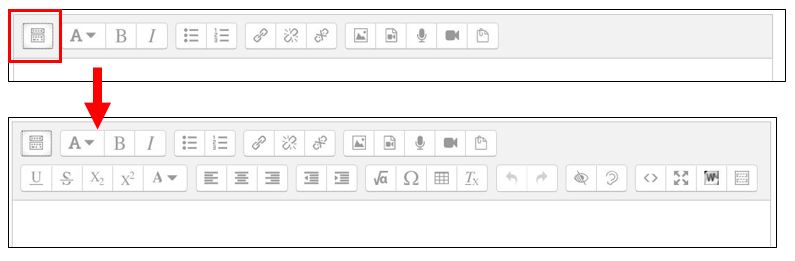
- Expand Text Editor Tool Bar: To make full use of the tools in the Moodle Content Editor, you must first expand the toolbar by clicking on the first button at the far left of the toolbar. This will reveal additional tools.
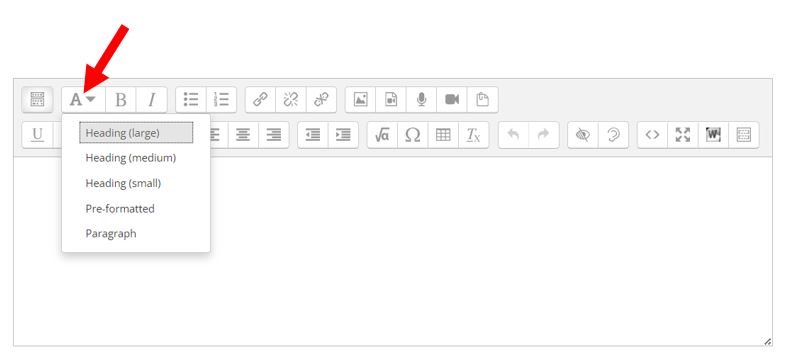
- Use Styles to Establish the Page Structure: Use the "Styles" function in the content editor to format the page text. Use the heading styles to format headings for major sections and subsections (rather than manually changing font size or using "bold" font).
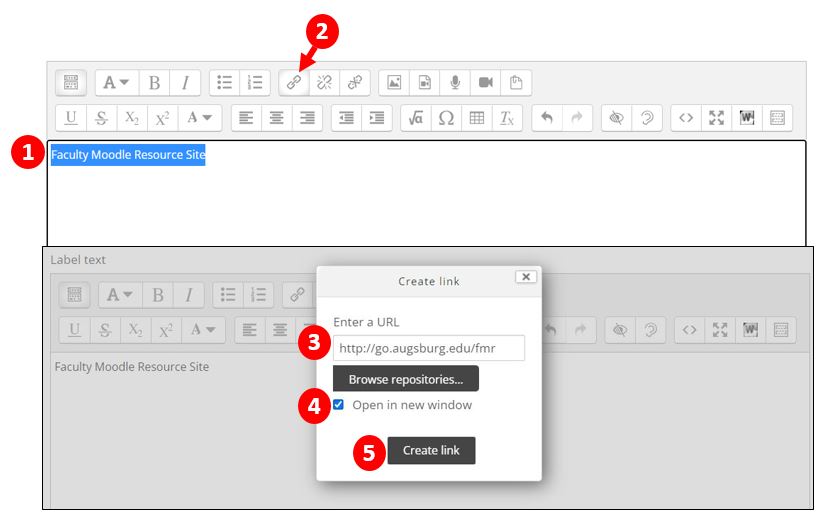
- Hyperlinks: Create hyperlinks with Display Text and avoid pasting in lengthy web addresses.
- Type several helpful words that describe the link, then highlight the text.
- Click on the link chain icon in the text editor.
- Paste the web address into the Enter a URL field.
- Check the "open in new window" checkbox.
- Click "Create Link."
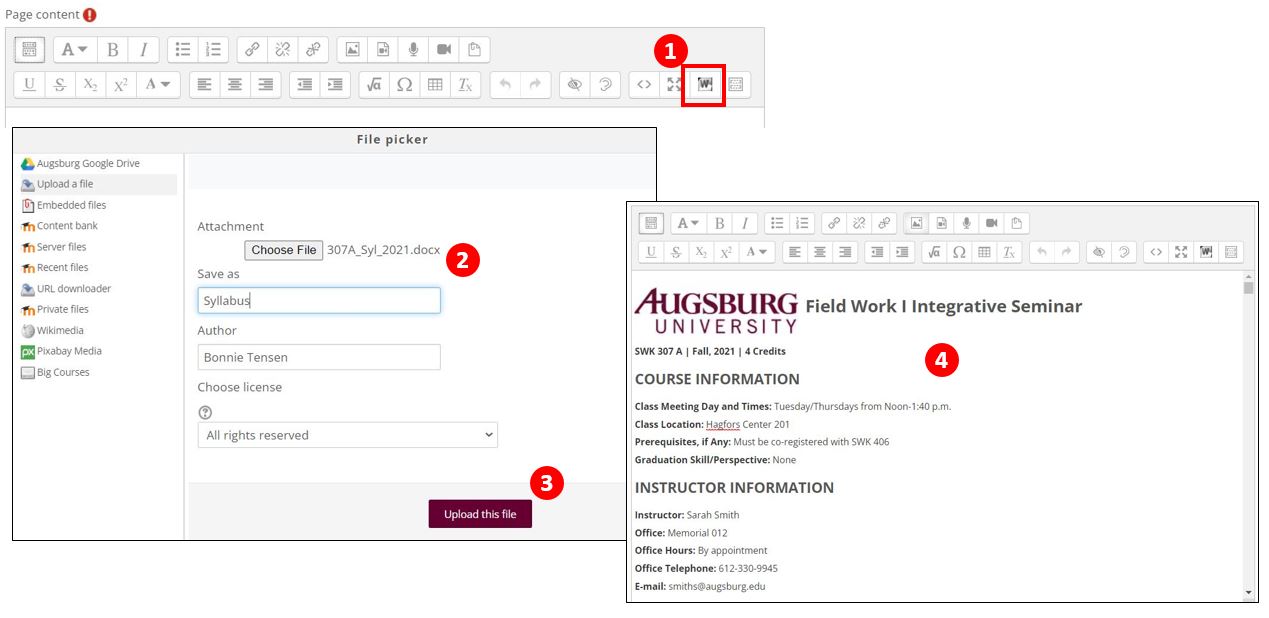
- Check and Retain Text Formatting from Word: If you’ve used styles in Word to add a heading structure to your text, then ensure when the text is pasted into Moodle, the styles and heading structure are preserved.
- Click the "W" in the toolbar
- Browse to select the document you want to insert
- Click "Upload this file"
- File will upload with formatting intact.
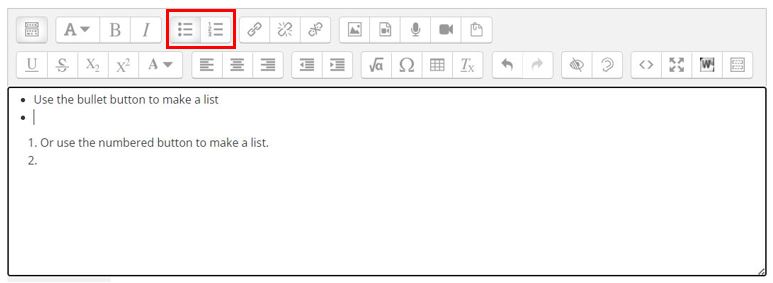
- Bulleted and Numbered List Buttons: When creating a numbered list or bulleted list, use the bulleted and numbered list buttons in the content editor. Place a period at the end of each list item to indicate the end of the list item.
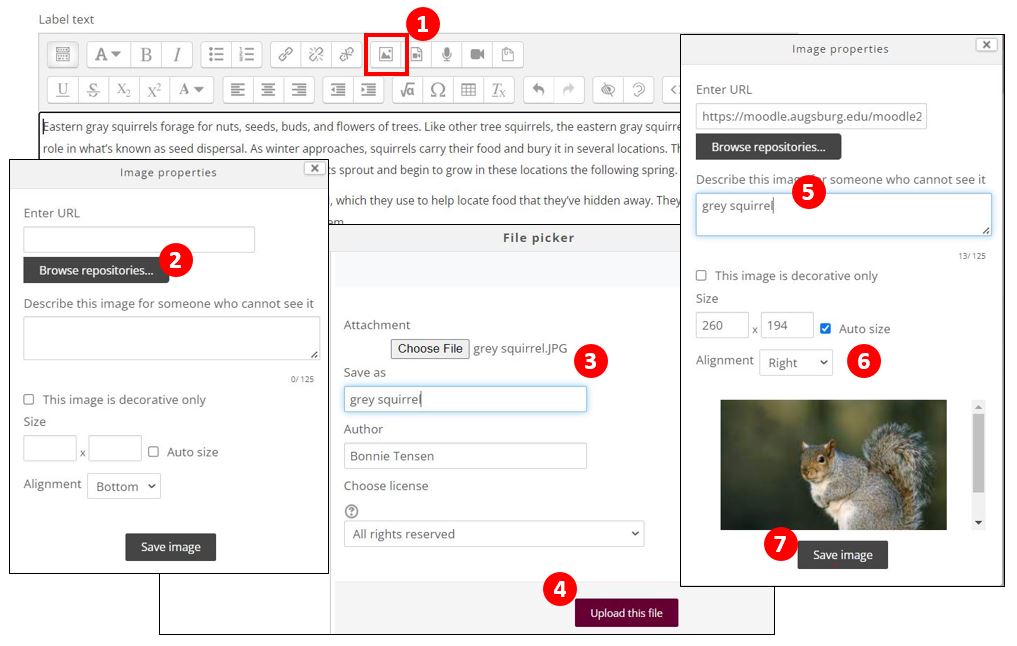
- Include Text Descriptions of Images and Graphics: Images and graphics should contain Alt Text, a text-based description of the image. Insert the image by:
- Click the "landscape picture" icon in the toolbar
- Browse to select the document you want to insert
- Choose the file
- Click "Upload this file"
- Add the "alt text" description of the image.
- Select right alignment
- Click "save image"
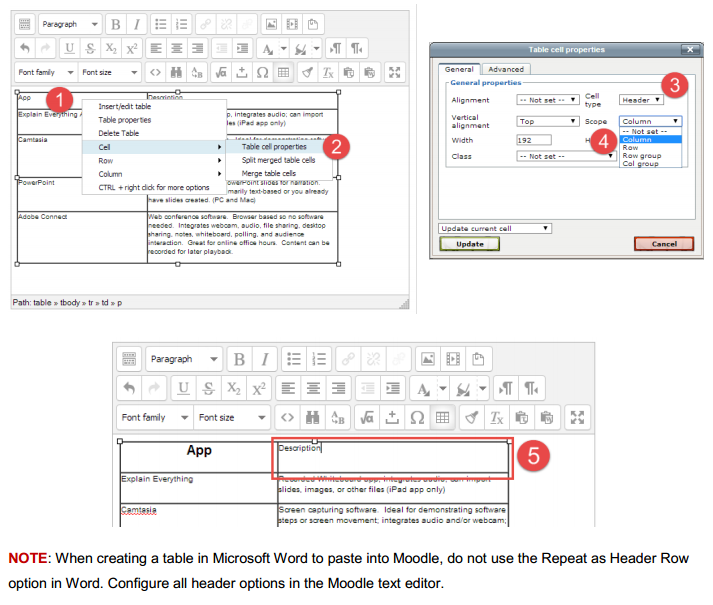
- Set Up Table Headers: Create tables using the Moodle text editor or copy and paste a table from Word into the text editor. Once the table is created or pasted, configure the table with headers and a caption (title) to make it accessible.
- Right click the first cell in the first row.
- In the menu, click on Cell > Table cell properties.
- Set the Cell Type to Header.
- Adjust the Scope to Column.
- Repeat for each additional header.
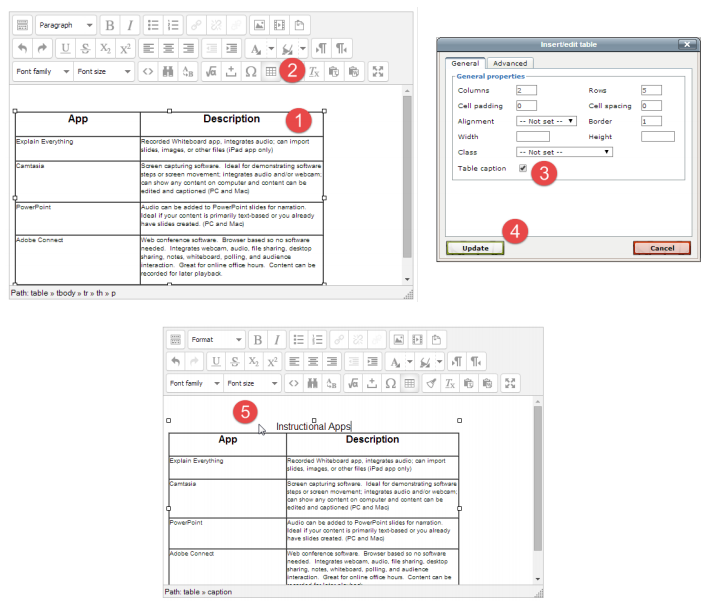
- Add Table Title (Caption)
- Click anywhere on the table to select it.
- Find the Table button in the text editor and click on it.
- Mark the checkbox for Caption.
- Click Update to save the changes.
- Click above the first row to type the table title.
(keywords: moodle, editor, edit, accessibility)
Last Modified: 2022/05/11
|