|
This article shows how to define exclusive access to any activity or resource in moodle to a group of students. This can be used to managing content in courses with merged enrolments between lower-division and upper-division students or multiple sections of the same course delivered by multiple instructors. Controlling access to activities to different participants requires the use of groups and groupings. The end result will be assignments that are only seen by the designated students in each assigned group.
For provide CLASS accommodations for specific students on a quiz activity see the article:
Accommodations for Extra Time in Moodle Quizzes
- Create Groups: Create two groups; one to assign the students using the original activity settings and another to assign to a student using the . (Note: You can name these groups however you wish and the students will not see the names of these groups as long as the course settings are set to 'No Groups' which is the default setting. If your course is set to separate groups. Participants who are assigned in the same group will see the name of their group only and others that are assigned to it. If your course is set to visible groups, everyone in the course will see the group names and their assigned participants.)
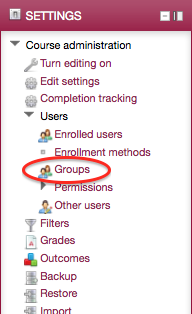
- From the 'Administration' block, expand the 'Users' menu under 'Course administration' and select 'Groups'
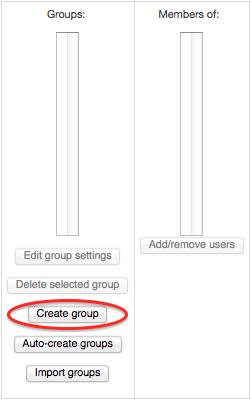
- Select the 'Create Group' button
2. Add Students to Groups:
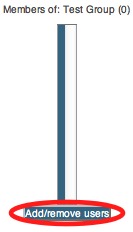
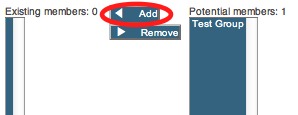
- With the group selected in the groups column, click the 'Add/remove users' button.
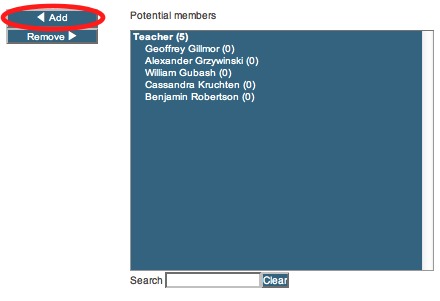
- Select from the list of potential members and click the 'Add' button. One of these groups should contain all students that will not be given any CLASS accommodations for this activity.
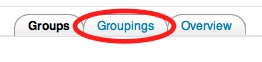
3. Create Groupings: Create a grouping for each group you created above. Names for groupings are not seen by those in a student role.
- Select the the Groupings tab, click the 'Create grouping' button.
- Enter the Grouping name and click 'Save Changes'.
4. Assign Groups to Groupings:
- In the Groupings tab, select the 'Show Groups In Grouping' icon in the Edit column.

- From the list of potential members select a group and click the 'Add' button.
- Click 'Back to groupings'.
5. Assign Activity Group Settings: If you haven't created your activity yet, you should do so now. If you already have one, use the Duplicate option (available when editing is turned on). Create one activity for each unique grouping. Modify the settings for these activities as needed to align with the needs of the members assigned to the group/grouping. (Note: It is recommended that the names of these activities be identically named in order to present a universal activity to all participants, but you might want to name them differently while building them to keep them straight for yourself.)
- Create a new activity or click 'Edit Settings' in the Administration block from within an exsiting activity.
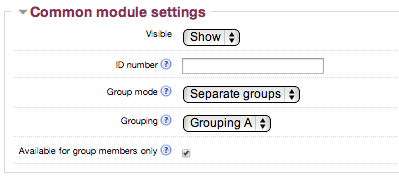
- In the 'Common module settings', set the activity's group mode to 'Separate groups'.
- Assign the activity to the appropriate grouping and check the box to make it 'Available for group members only'.
Once the activity is assigned to a grouping, instructors (not students) will see in brackets the grouping name next to the activity. Each assignment will appear in the gradebook as a separate item.
(keywords: )
http://go.augsburg.edu/classgroup
Last Modified: 2013/12/10
|