|
When creating or editing the settings for most Moodle activities (e.g., Assignment, Label/textbox, Page, Forum) the content editor appears. One of the buttons includes a list predefined templates which you can select to pull pre-formatted content into your activity. If there are other items widely used across your academic department that you would like to see included as a predefined template, please connect with your LFC (Liaison for Computing).
- With editing turned on for the course, either add an activity/resource or edit settings of an existing activity/resource.
- Select the first button on the left to expand the toolbar.

- The toolbar will expand from one row to show four rows of tools. Select the last button on the third row, called pre-defined template.

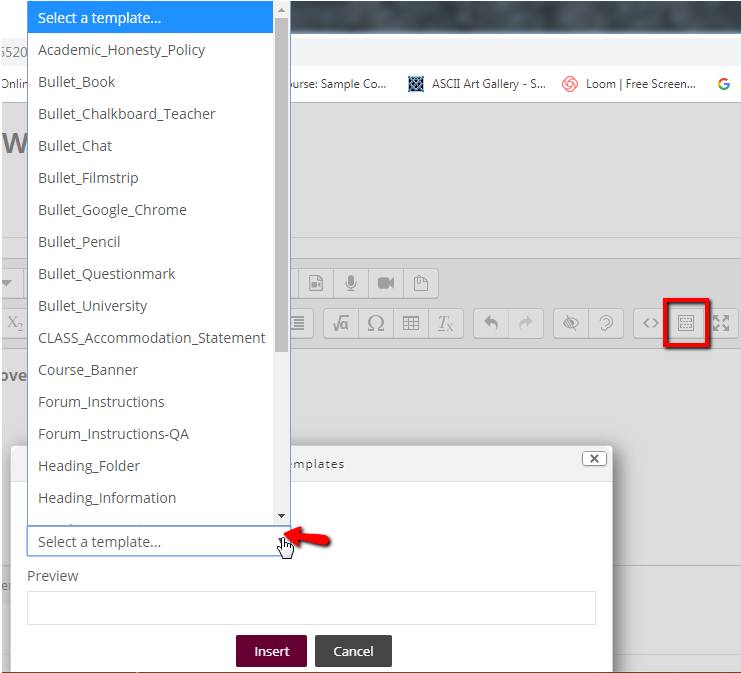
- The Template dialog box opens. Select the drop down menu to view template options.
In this example, "Style Zoom Label" will be selected. The Zoom label contains information students need in order to be able to connect to an instructor's Zoom Meeting ID along with a dial-in option to be used in case of audio issues.
- Once a template is selected, a preview may or may not appear depending on the content editor you are using. Previews will appear in the ATTO content editor, though not in Tiny MCE. Select the Insert button. The screen will refresh and bring up the editing window with the inserted template.
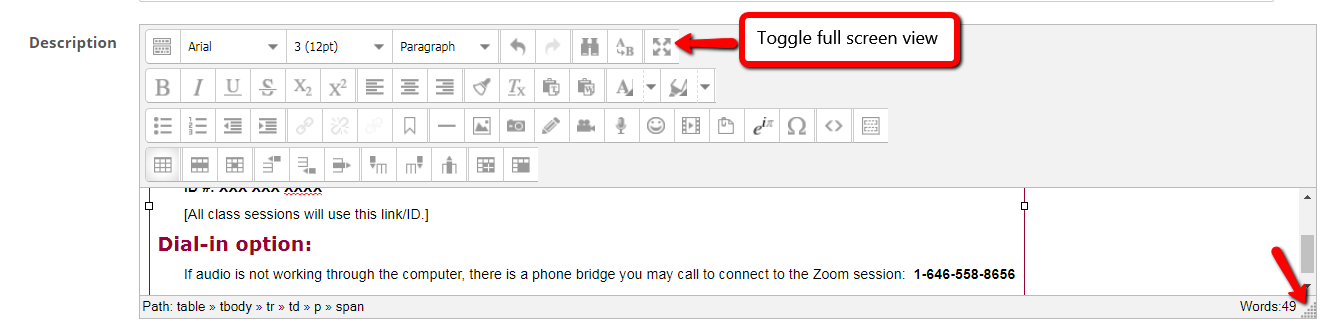
It can be helpful to resize the field being edited to have full view of the content. One way to do so is to select the toggle full screen mode button (last button on the right of the top row). After editing, you must select the button again to toggle back and restore the original size in order to see the Save button. Another option is to resize the window by selecting the lower right corner, holding down your left mouse button, and dragging the dialog box to the appropriate size.
To edit templates, highlight and type directly over the text.
- In the Zoom Label, edit the URL to be your own and edit the ID#. This information can be found by logging into http://go.augsburg.edu/zoom and viewing your profile page which has this information. Make sure to use the chain link button to creating a clickable link (also known as a hyperlink or URL—Uniform Resource Locator). Need to know more about creating hyperlinks in Moodle?
- Lastly, make sure to scroll down to the bottom of the page and select Save Changes.
Related knowledgebase articles:
http://go.augsburg.edu/5url
Quick link to this article: http://go.augsburg.edu/pdt
Last Modified: 2020/08/18(Faculty) For additional help with Moodle, visit the Faculty Moodle Resources site at http://go.augsburg.edu/fmr.
|