|
Once you have your ArcGIS Online account set up (see link at the bottom of this article for info on requesting an account), you can begin creating maps and apps. The first step is to create a map in ArcGIS. The map, along with multi-media (e.g., audio, video, images), can be gathered into a story map and published online.
There are different types of story map apps serve a variety of purposes. Each type has a template (graphic organizer) for structuring your data in a way that tells a story.
View the types of Story Maps and tutorials for creating one.
- Read the "Before you start" section of the tutorial. You will find helpful tips such as "gather and organizes all the media you want to use".
Note: When building a Story Map Tour, images with landscape orientation are preferred.
- Sign in to ArcGIS Online: https://www.arcgis.com/home/index.html
Note: If you have already created a map on ArcGIS Online, click "Share" and select "Create a Web App".
- Select "Apps" from the horizontal menu at the top of the page.
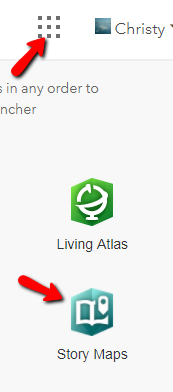
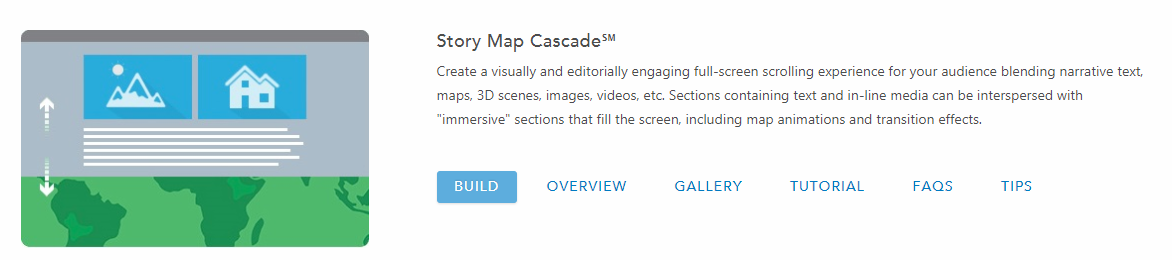
- Click the "Build" button next to the type of Story Map you would like to create. The Cascade style is popular.
- Click on the objects to enter a title, add image or video to the Cover of the StoryMap Cascade. The image will become the background.
Images may be added from ArcGIS, Flickr, Google+, Unsplash or via a link to the content (in Google Drive, for example, though remember to set the permissions according to how the map will be shared to "public" if the map will be shared publicly).
Note: Images can be uploaded to ArcGIS only after a StoryMap is saved. This is not the best option as we have limited storage space on ArcGIS. It would be best to create a Google Drive folder with permissions set to "public" or "anyone with the link can access" so that all images in the folder take on the same permission setting.
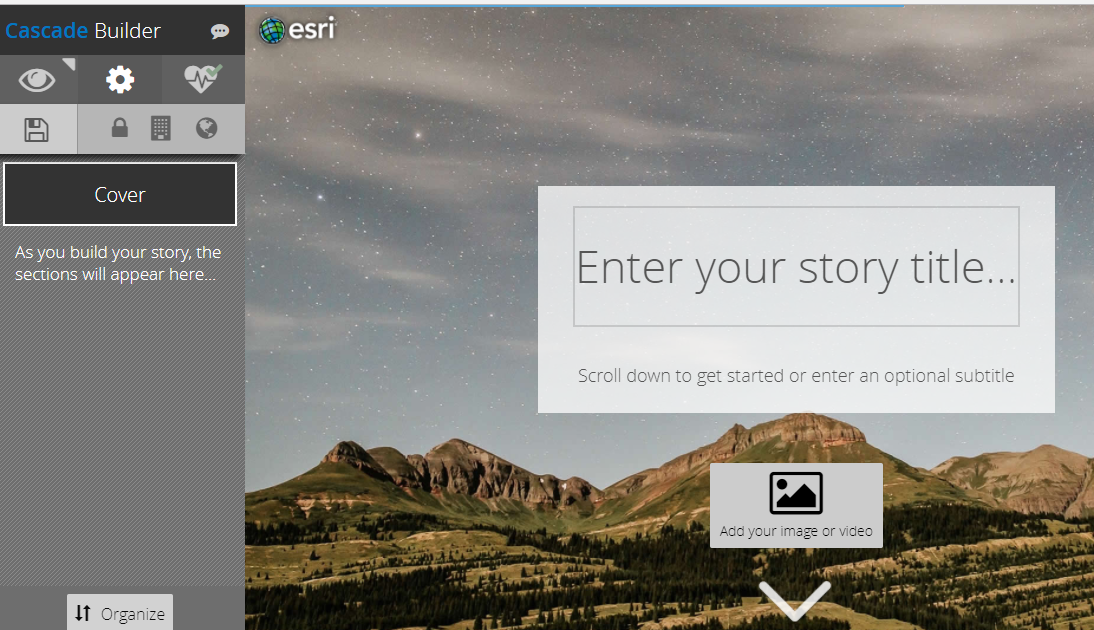
- Click the white down arrow at the bottom of the screen to reveal a tiny gray plus sign.

- Click the plus sign to open the menu for the next section type. The options are: Text, Media, Title, Immersive. Click the desired option. You are now well on your way to creating a StoryMap.

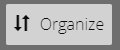
- No worries if content is out of order or you wish to add new content in between sections. Simply select the "Organize" button on the lower left corner to drag and drop the sections to reorder them.
- The last section is for adding credits, sources, and references.
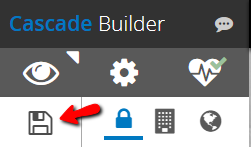
- Select the "Save" button in the upper left, then click the "View" button (eye icon) to preview. Only you can see the StoryMap at this point. Select the appropriate privacy setting: blue lock = private; grid = Organization only; Globe = Public.
- From the horizontal menu bar at the top of the web site, select "My Stories" to access your saved StoryMaps or find all content listed under the Content tab on the home page.
Need an account? Log in to https://augsburgu.maps.arcgis.com using your Augsburg credentials.
Create a Map http://go.augsburg.edu/arcomap
StoryMap Tutorial from UMN: https://drive.google.com/file/d/1fCyNZ19x5X7AKEyd1zqGjzpiMEzfTmbF/view?usp=sharing
(keywords: DH, digital humanities, digital scholarship)
http://go.augsburg.edu/arcstorymap
Last Modified: 2019/04/18
|